Wednesday, April 30, 2014

RECIPE: The Best Homemade Night Cream EVER

I found this article on Mommypotamous' blog about a "naughty" skin care ingredient, and since I happened to have ingredients on hand, I tried it out myself. OH MY! It is amazing. So I made a whole bunch for my family and friends and they kept asking for more.

The "Secret" Ingredient: TALLOW!


It is so heavenly. I want to share the recipe so you can make your own. Here is an excerpt from Mommypotamous' blog post:

"Tallow is uniquely compatible with the biology of our cells. About 50% of the structure of our cell membrane comes from saturated fats, with remaining amounts consisting of monounsaturated and to a lesser degree polyunsaturated fats. According to Nourishing Traditions, it is the saturated fats that give cell membranes the “necessary stiffness and integrity”  necessary for proper function (p. 11). In a research article which I was privileged to preview before publication, I recently learned that:

“Healthy, ‘toned’ skin cells with sufficient saturated and monounsaturated fats would undoubtedly make for healthy, toned skin.Interestingly, tallow fat is typically 50 to 55 percent saturated, just like our cell membranes, with almost all of the rest being monounsaturated, so it makes sense that it would be helpful for skin health and compatible with our cell biology.” (emphasis mine) There are other points of biological compatibility, too, such as the fact that tallow and sebum consist primarily of a type of lipid called triglycerides. (“Sebum” actually means “tallow” in Latin, so we are not the first to make this connection!)
Now, on to the recipe:

INGREDIENTS:

9 parts tallow (grassfed is the best)  (How to make your own tallow)
1 part liquid oil (i.e. avocado oil, olive oil, jojoba oil, almond oil)
Essential oils of your choice (I use a blend of lavender and lemongrass, my favorite!)

(for example: If you use 4 1/2 cups of tallow, then you would use 1/2 cup oil -- this would be a LOT of night cream, so you may want to use 2 1/4 cup tallow and 1/4 cup oil, or whatever ratio works best for you).


Note: The tallow will be hard, so you want to melt it. I am not 100% accurate with my 9:1 ratio of tallow, and it doesn't matter. If you want the final product to be a bit softer and easier to spread, use a little more oil, and if you want it to stay a harder cream (reminds me of the consistency of Burt's Bees lip balm), then use the 9:1 ratio.


DIRECTIONS:

1. Add the tallow to a saucepan and melt it ON LOW HEAT. Alternatively you can put it in a glass jar in a pot of boiling water. Since it is food grade and edible, I don't mind using my saucepans.

2. Remove from heat.

3. Add the liquid oil. My favorite is avocado oil. My second favorite is almond oil. Whatever your preference is.

4. Let cool slightly. We don't want it to cool off too much, as it will turn to a solid at room temperature and we still need to add the essential oils. Maybe 10-15 minute cool off period

5. Add your essential oils. The tallow does not smell bad, but you can sort of smell it still, so I go a bit overboard on the essential oils. I love lavender and lemongrass together, and the lavender adds a lot of benefits to your skin. If you do choose a citrus oil, just be aware that the citrus oil will make your skin more susceptible to a sunburn, and proceed with caution. If you have acne issues, adding tea tree oil will be beneficial.

6. Pour into small jars. Let cool on the counter.

I use half pint canning jars. I have seen some people use old baby food jars (the perfect size for about 3-month supply if you use a lot -- otherwise you can stretch it further).

TIP: This works GREAT as a night time hand cream as well.

About Me: Hi! I am Rebecca :) I am the owner of Purify Your Body Detox Foot Pads. I love natural health and wellness, and I love to eat real food. :) 

I love my family, and my pets. I actually love all animals -- they are much nicer than most humans! I don't watch TV and haven't watched a movie in the theater for more than 6 months. I would much rather read a book!

I love to garden and make homemade products -- body butter, toothpaste, perfume, cheese, yogurt, etc. It tastes better when it's made from scratch!  Contact me here: sales@purifyyourbody.com

DIY: Make Your Own Tallow

So... how do you make your own tallow? I was a bit "freaked out" about the idea of rendering my own lard or tallow, until I tried it. And then I realized HOW EASY IT WAS. You don't need to be from Little House on the Prairie to learn these skills. You can do it in your own kitchen (although I will advise you to do it outside if at all possible because of the smell).

It is actually quite simple, and there are many ways to do it (i.e. you can use a pan on the stove on a long simmer) but I am going to walk you through how I do it with a crockpot.

There may be many ways to render lard or tallow -- to get the same result, I am going to use my way. If you have any pointers, tips, etc you are welcome to put comments in below, in fact, I welcome them as I always am looking for tips to make life easier!

Tallow -- comes from cows
Lard -- comes from pigs


1. Find a good source of "suet".
slab of bovine kidney fat
Suet is organ fat -- especially the fat around the kidney of the cow. It could also be called suet from a pig, so when you go to the butcher shop to request the suet, specify what you want.

We order a full cow from a local farm and split it with my sisters. They don't want the suet so I request that (and the bones, etc) from the butcher when I go to pick up the cow.

If you don't live in an area where it is readily available to do that, then just go to your local butcher shop (or ask around at the butcher shop in your grocery store -- you may be surprised that it is available there!)


Of course, the best would be finding a local, grassfed source. You may be able to buy it online (tallow) but it is probably pricey. The lard you find at most stores is so over processed and filled with chemicals I DO NOT recommend it.

This is the hardest part about making tallow. So once you have this done, the rest is a breeze.

I would recommend starting out with less than 5 lbs of it -- this will make enough to last a while -- you can use it to fry chicken, potatoes, etc. or make soap, or make beauty products like the best face cream ever.

2. Chop the suet into pieces around 2".

pieces of chopped suet

This doesn't have to be exact. It makes it "render" quicker and makes it easier to fit into the crock pot when they are smaller pieces/chunks.


3. Put the suet in the crock pot on LOW for about 24 hours.

image from Google
 This one also doesn't have to be exact. You will know when it is done. For a larger batch, you can go a longer period of time (depending on the size of your crockpot). For a smaller batch and smaller crockpot, it may take only 12-18 hours).

But, I HIGHLY recommend doing it outside if possible. This smell is not one that is appealing. And, if you are neurotic like me and can't stand the thought of sleeping while something in the kitchen (like the crock pot) is plugged in and cooking, for fear of fire, then outdoors will allow you to sleep better as well!

4. Scrape off the "impurities from the top.

This image is from Divine Health From the Inside Out
Once the allotted time is up, you will see the "impurities" that have risen to the top of the crockpot. This is the reason why we "render" lard or tallow -- fat has a way of holding on to and storing impurities (in our bodies, too). We want this to be as pure as possible. Throw those impurities away!

5. Pour into glass jars.

image from Google
Let the hot liquid sit for a bit. It will be a clear yellowish liquid. Then get your jars ready. I use canning jars but you can use old glass jars laying around (as long as they are clean).

You can use a funnel to pour or you can use a ladle, whatever is convenient for you. Fill the jars up and let them cool off a bit before putting them into the fridge. They will last longer when kept in the fridge.

6. YOU ARE DONE! AWESOME! Wasn't that easy?


image from happymoneysaver.com
When the tallow cools off it will be a milky-white solid. You can use it to fry homemade potatoes/fries, or chicken. You can use it for beauty products, or soaps. And, knowing that it has no chemicals or additives in it, and is healthy, should make you feel proud of yourself! Great job!


About Me: Hi! I am Rebecca :) I am the owner of Purify Your Body Detox Foot Pads. I love natural health and wellness, and I love to eat real food. :) 

I love my family, and my pets. I actually love all animals -- they are much nicer than most humans! I don't watch TV and haven't watched a movie in the theater for more than 6 months. I would much rather read a book!

I love to garden and make homemade products -- body butter, toothpaste, perfume, cheese, yogurt, etc. It tastes better when it's made from scratch!  

Sunday, April 27, 2014

RECIPE: Nut Butter Chocolate Treats -- Healthy and Delicious (Use Almond or Peanut Butter)

I made my own almond butter for this batch, and left some almond chunks, YUM!
It is so much fun to bring the tastiest -- and healthiest -- treats to parties and potlucks. And when people realize that they are healthy, they get excited. Finally something healthy that tastes amazing, and super easy to make, too!

INGREDIENTS:

1/2 cup raw honey 
3/4 cup extra virgin coconut oil (NOT expeller pressed) 
1/4 cup grassfed butter (I use Anchor brand) 
1 1/2 cup almond butter 
1/4 cup raw cacao powder

I also add some Himalayan pink salt and some homemade vanilla extract to my recipe.

DIRECTIONS:

Mix all the ingredients on LOW heat until just barely melted.
Put wax paper down on a cookie sheet that has a lip (not one that is flat all around) 
Spread the mix on the cookie sheet. 
Put in freezer (on level surface) for an hour or so until it is quite solid. 
Then cut or break into pieces. Enjoy!!

TIP: Store in the refrigerator or freezer.

Sometimes I use miniature baking cups, when I want a better "presentation"

And, I especially like the health benefits of raw cacao.... It has a ton of antioxidants in it and some great minerals, especially magnesium. The only thing to be aware of is that it has a higher level of theobromine, which can act as a stimulant. Milk chocolate does not have much theobromine in it, but the darker, raw cacao does.


About Me: Hi! I am Rebecca :) I am the owner of Purify Your Body Detox Foot Pads. I love natural health and wellness, and I love to eat real food. :) 

I love my family, and my pets. I actually love all animals -- they are much nicer than most humans! I don't watch TV and haven't watched a movie in the theater for more than 6 months. I would much rather read a book!

I love to garden and make homemade products -- body butter, toothpaste, perfume, cheese, yogurt, etc. It tastes better when it's made from scratch!  Contact me here.

Monday, April 21, 2014

What Would You Have Done Differently With Your Health?

If I had a time machine and could go back to my childhood,  would have done some things differently with my health, had I known then what I know now. Here is what I would have done. (Oh, I wish a time machine like this really existed, don't you?)

Purify Your Body


Here are the top things I would have done differently:

1. Soda pop. I would not have drank soda pop -- except maybe an occasional dessert like root beer floats. I cringe when I think of all the 64 oz fountain sodas I used to get at the mini marts. I also regret the time in my early 20s when I switched to diet pop. For a few years there I was drinking a 2L of diet pop every two days!

2. Sugar consumption. Totally. I didn't get much sugar at home (we had dessert maybe a couple times per week, especially on Sunday nights). But whenever I went to a party or a friends house, we gorged ourselves with candy. Halloween? I could eat my whole pillowcase full of candy in one sitting. Same with Easter candy and Christmas candy. I could have 3 HUGE pieces of cake and still crave more. If I could go back I would severely limit my sugar consumption.

3. Relax more. To this day I do not know how to relax completely. I wish I could have learned this skill as a child and carried it into my adulthood. I would have gotten so much more rejuvenating sleep. Now, as it stands, I am so sleep deprived that I am considering resorting to sleeping pills.

I do not eat sugar now, nor do I drink soda pop. I am grain free as well. But I don't think I would have changed the grains as a kid. I never went overboard on breads and pastas to begin with so it was easy to remove them from my diet as an adult.

I think it would have been nice to have my detox foot pads back then, to see what gunk I would have been able to pull out.

Please tell me the top 3 things you would have changed in your childhood, regarding your health, if you could go back in time!


About Me: Hi! I am Rebecca :) I am the owner of Purify Your Body Detox Foot Pads. I love natural health and wellness, and I love to eat real food. :) 

I love my family, and my pets. I actually love all animals -- they are much nicer than most humans! I don't watch TV and haven't watched a movie in the theater for more than 6 months. I would much rather read a book!

I love to garden and make homemade products -- body butter, toothpaste, perfume, cheese, yogurt, etc. It tastes better when it's made from scratch!  Contact me here.


Tuesday, April 1, 2014

Best Natural Deodorants - Non Toxic Ways To Smell Fresh!

deodorant stone
Thai crystal deodorant
I have tried quite a few natural deodorants. Some of them work quite well but are time consuming (and I am lazy), others don't work as well. I found one that seems to work the best for me, and it is all natural and super easy to do!

Here is a list of natural deodorants and how well they worked for me:

1. Thai Mineral Stone. This works ok, especially in cold winter months when you don't sweat a lot. It lasts a LONG time, I could see one stick lasting 18 months or longer.

natural deodorant
Sunshea Products Pit Stick
2. Pit Stick Natural Deodorant by Sunshea Products. This works well in keeping odor out but you still sweat with it, making it hard to use where I live in Panama when it is 85-90 degrees every day. It smells FANTASTIC and I do recommend this product to those who want to try it. It is one of the least expensive natural deodorants I have found, and lasts a long time (not as long as the Thai crystal deodorant stick though!)


3. Slice of Lime. Seriously. This stuff rocks your socks off. We have a lime tree in our backyard and during its season I just cut up a lime and used it in my armpits. I did not have any issues using it right after I shaved, however, a friend of mine said it did irritate her skin. You don't sweat as much with this one, but right now it is inconvenient since I don't have any limes, and I always forgot because then I would have to go to the kitchen, open the fridge, etc right after my shower and it didn't work with my scheduling (see, I am lazy!). And, It does end up being expensive if you have to purchase your own limes. One lime per week ends up being about $3-4 per month.


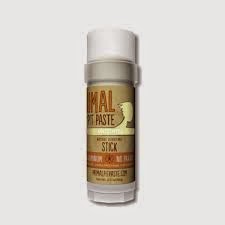
primal pit paste deodorant
primal pit paste

 4. Primal Pit Paste. This stuff is a clay-based deodorant that seems to work well, many people give it good reviews. I have had friends make a homemade version with baking soda and bentonite clay, but it caused red irritation in their armpits. I have not tried the homemade version, but the Pit Paste works well!

I have not heard of anyone who said the Primal Pit Paste did not work for them. So this is a safe bet if you want a good non-toxic deodorant.


neutralizer gel and deodorizing essential oil
neutralizer gel and deodorizing essential oil blend

5. Neutralizer gel and deodorizing synergy blend essential oil. This is my new favorite as it smells SO good and causes absolutely no irritation. I purchased the essential oil thinking I would try making a DIY clay-based deodorant recipe. But when I got it, I smelled it and wanted to try it right away. So I just took a small pea sized amount of the neutralizer gel that I have, added 2 drops of the essential oil, and rubbed it together in my hand, and then used it on my armpits. Heavenly! And I still smell good the next morning.

You can use that essential oil blend with a DIY deodorant recipe of your choice. I am so happy that there is no irritation whatsoever. And I am happy that I had neutralizer gel on hand. It is great for so many things, from sunburn relief, to skin care, etc.

Whatever natural deodorant works best for you, know that you are doing your body a great service by not using traditional toxin-filled anti-perspirants. And, if you want to get rid of the toxins in your body you can do that by using my detox foot pads -- a great way to detoxify and pull the chemicals from your body that can wreak havoc on your health.